Vector Image
A vector, on the other hand, is also known as object-oriented graphics. The images are constructed using mathematical formulas describing colors, shapes, and placement. In a bitmap, it is a grid of pixels that form the image, while a vector graphic consists of shapes, curves, lines, and text to make a picture. A vector graphic contains instructions on where to place the various components. It is even possible to embed a bitmap graphic within a vector graphic. Moreover, it is composed of many lines as compared to bitmap images. It also has a smaller file size and can be made infinitely.
Comparison between a bitmap image and a vector image
Also, a bitmap graphic tends to be much larger than a vector graphic. Bitmap graphics are easily affected by resolution. However, vector graphics are not affected easily, and instead, their shapes are redrawn to compensate for the change in resolution. It is easy to convert bitmap files to another and also convert vector graphics to a bitmap. However, it is hard to convert a bitmap graphic into a true vector graphic. Vector graphics are also not appropriate for complex images.
How to vectorize an image in Photoshop:
Do you know how to vectorize an image in Photoshop? It is not that hard as long as you take all the necessary steps needed to complete the cause. We have simplified the steps for you for easy understanding. Steps to take:
First, open your Photoshop software. The latest versions tend to have more features than older versions. They are also easy to operate. Open the specific image with Photoshop; File > Open > Select your image from your PC.
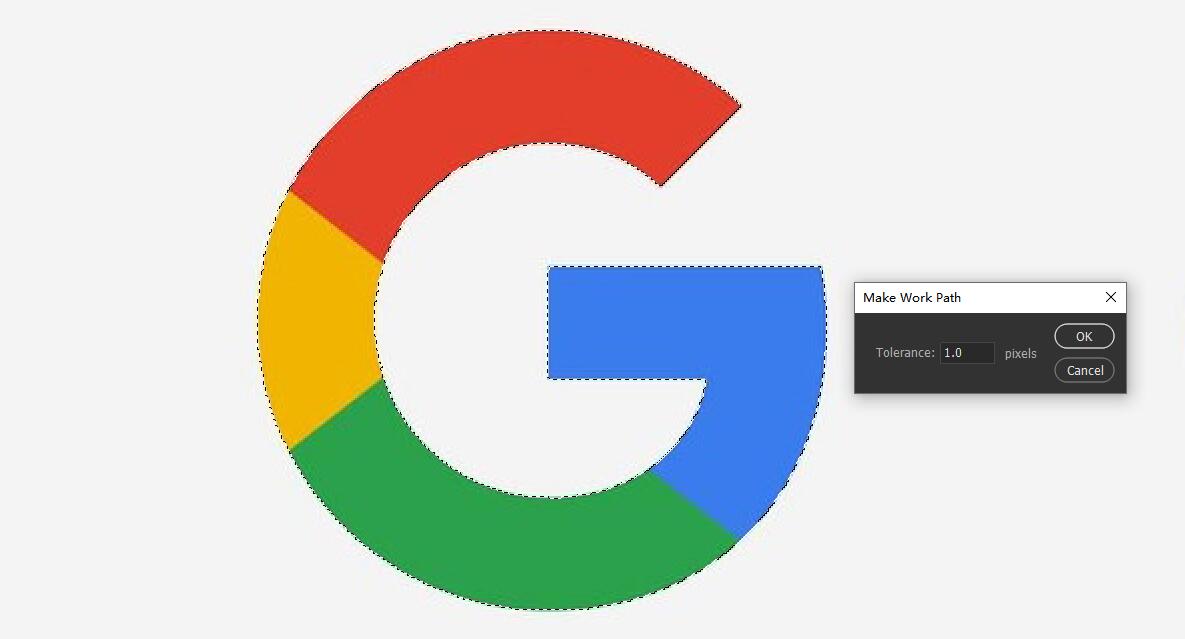
On the left bar menu, select the magic wand tool or lasso tool, or any other selection tool to select the image. While selecting, if you mistakenly select the background, use the reverse selection to deselect (Ctrl + l)
While still working on the workspace, right-click to establish the working path. With the image stability, set the appropriate tolerance which is about 1-3 pixels. That is vital to remember to get the best results.
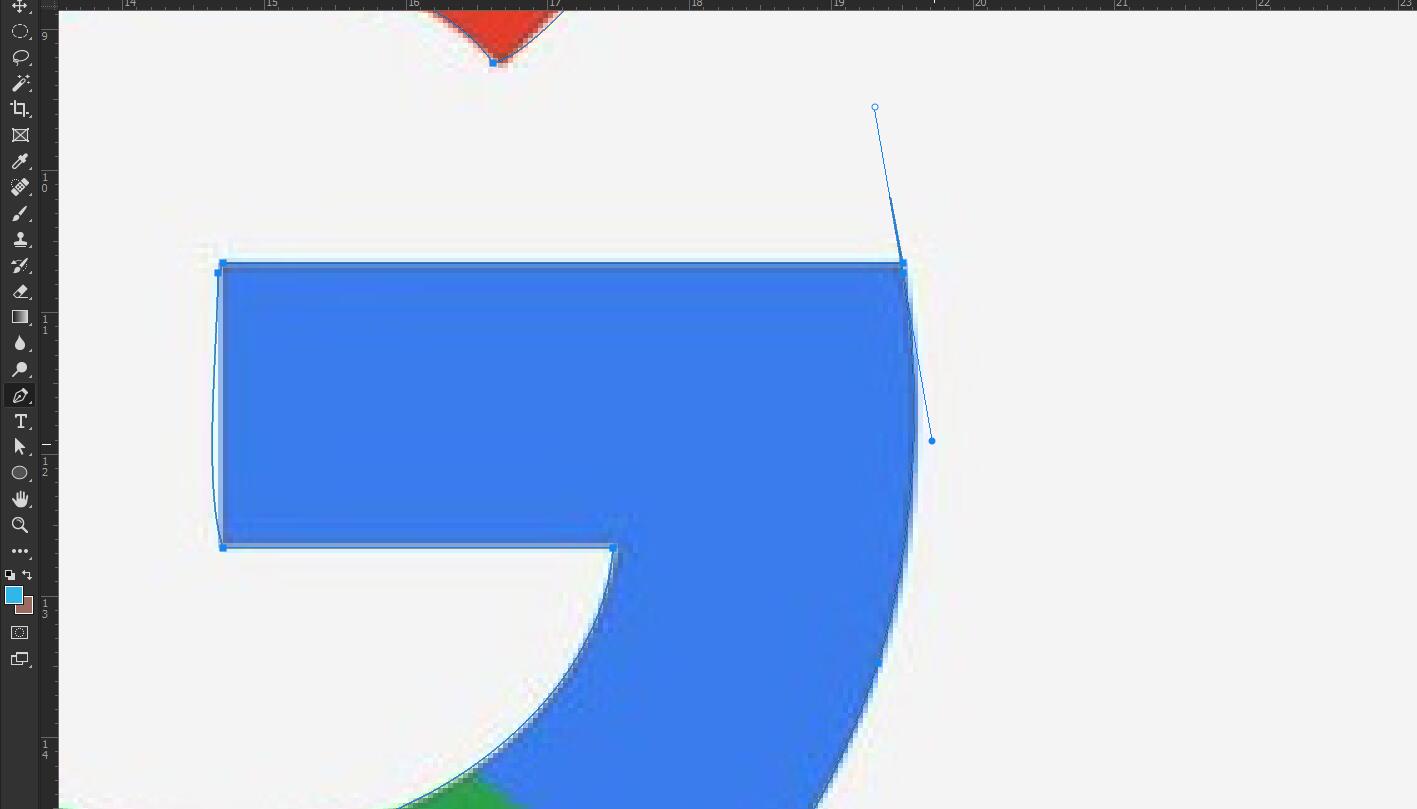
After the process, if you are not satisfied with the selected range, use the pen tool to adjust and add or remove the anchor points. If the anchor points have an inaccurate position, hold down the Ctrl key and use the left mouse button to adjust positions.
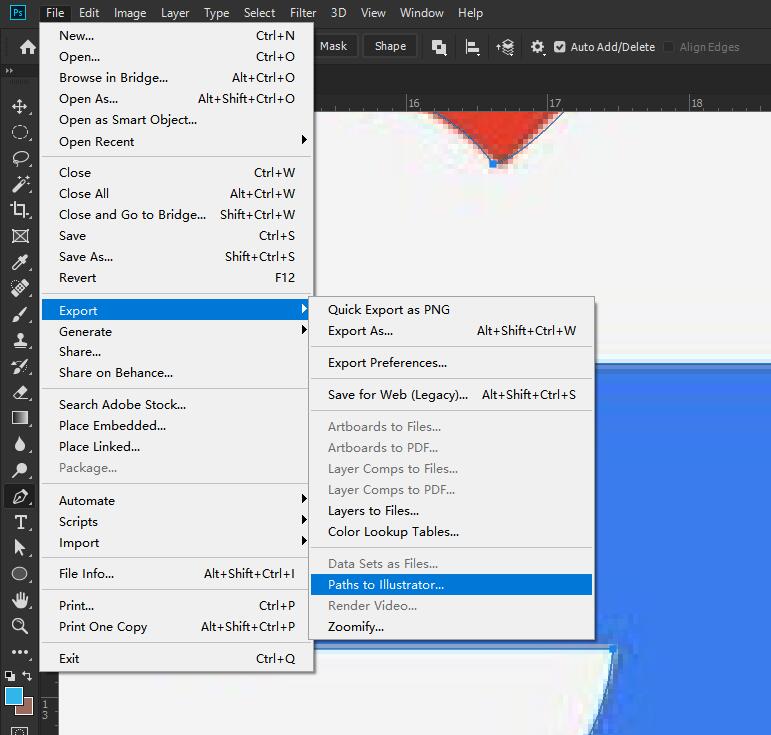
Then select the tool to create the vector mask of your image. The next step is to export the vector paths by clicking, File > export > paths to illustrator.
This formula helps you to produce paths that don’t have any color. However, if you need a vector image with color, you need to select and fill sub-paths for each color block.
How to vectorize an image in Illustrator:
These are the steps you can take:
The first step is to open your Adobe Illustrator software. Open the image to be vectorized through the File menu. Then click the specific image to select it.
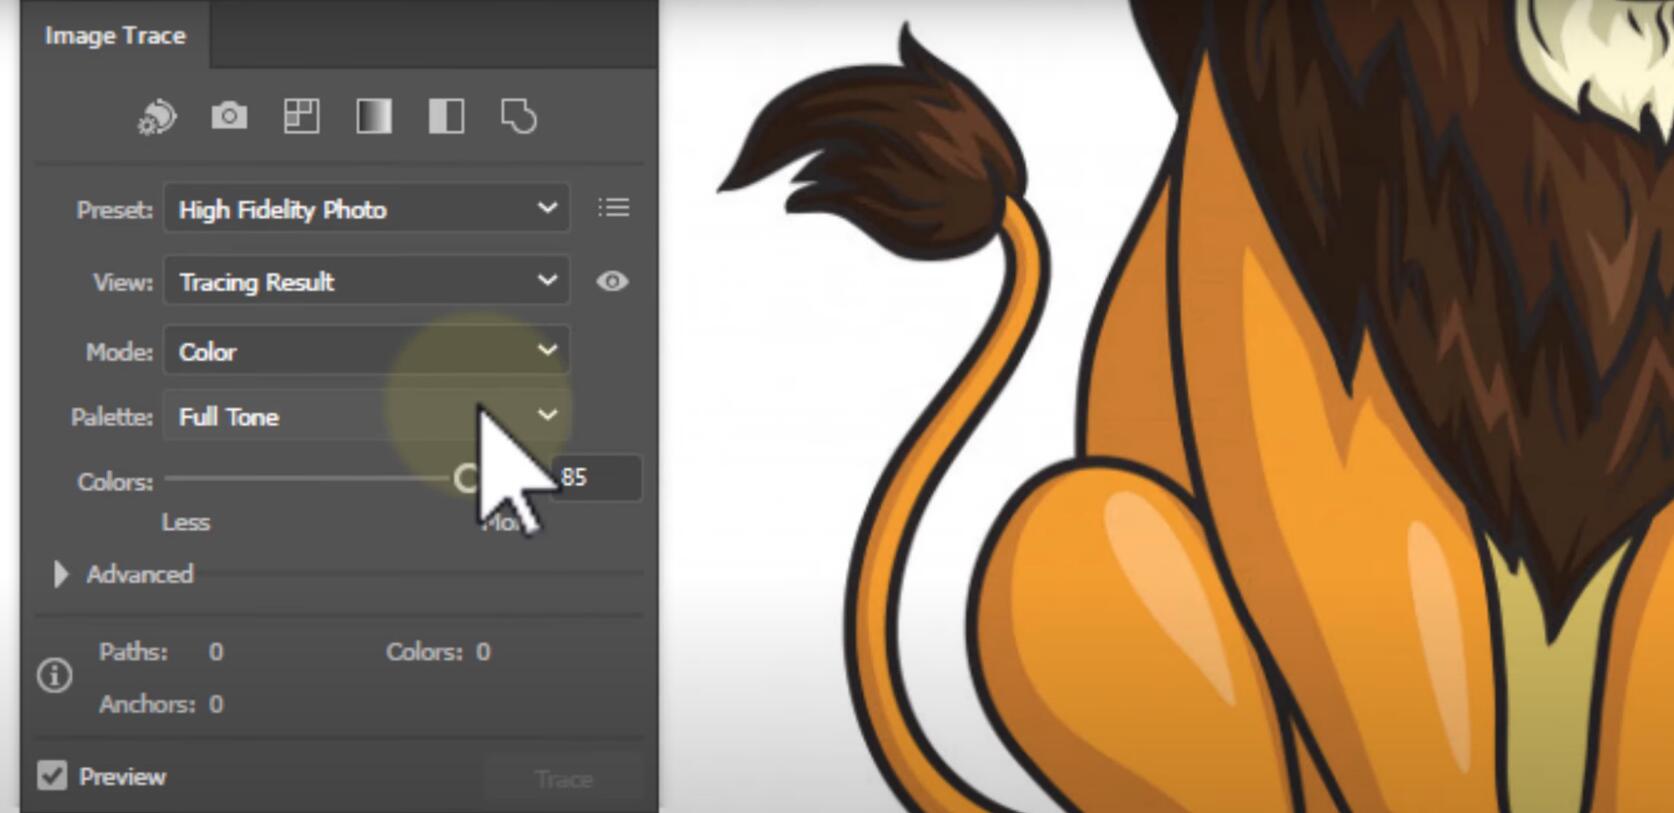
The best tool to use is Image tracing. You can do this by clicking Windows> Image tracing. Alternatively, click the object menu > Image Trace > Make
Choose an ideal tracing option. Moreover, you can get an idea vector image by adjusting the presets and view parameters.
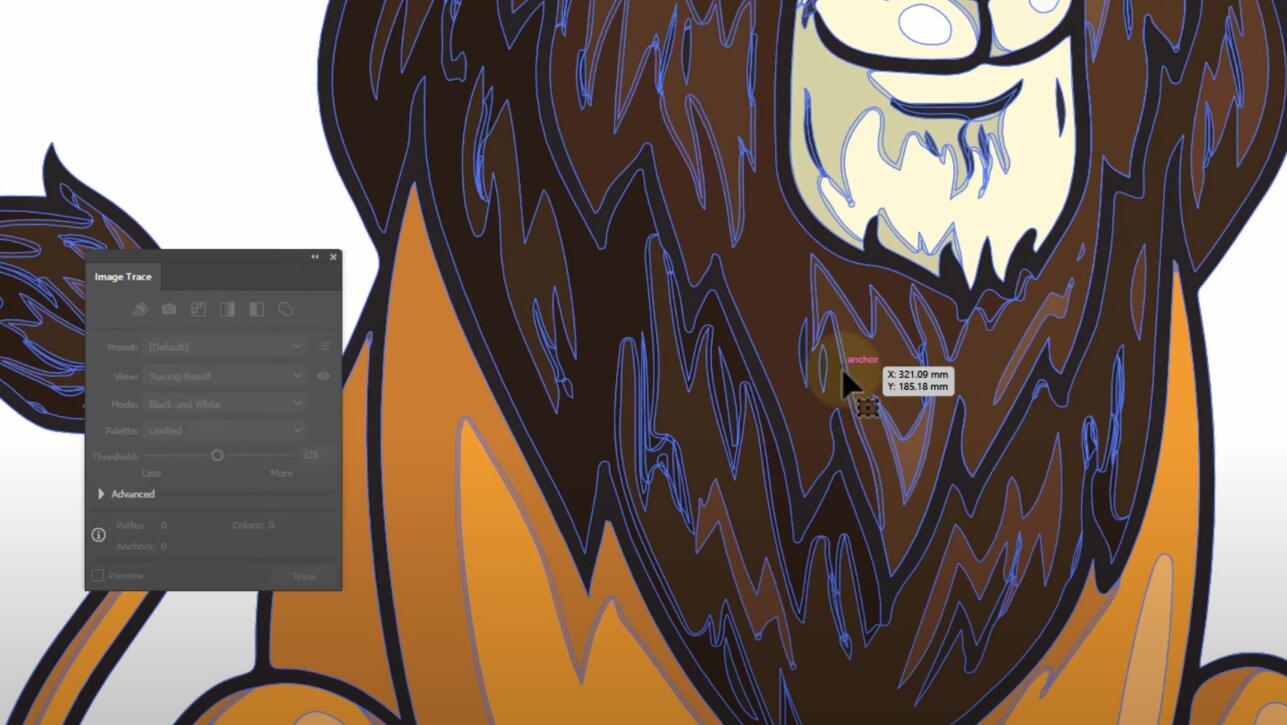
This allows you to output the colored vector images and you can also adjust the anchor points for smoother graphics.
After editing, you can save the files ad SVG or any other vector format
There is also a similar feature in Coreldraw that you can try it out.
Online tool:
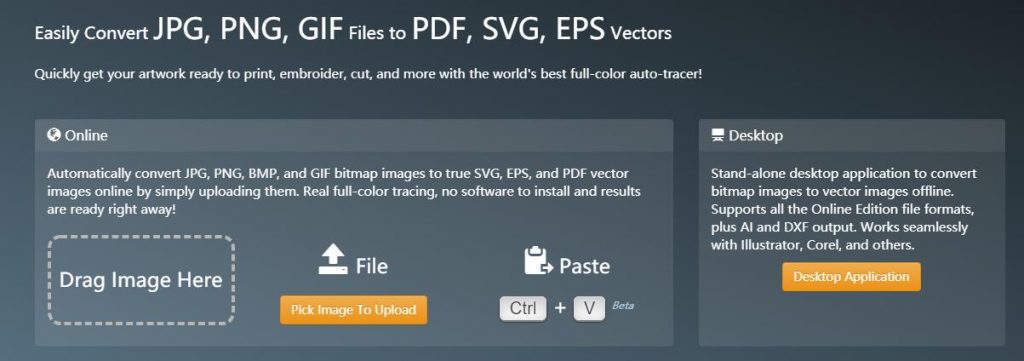
(1) Vector magic
Paid plan: Free, $9.95 per month or $295 for a license Vector magic is another online tool that you can use to vectorize your images. All you need to do is upload your image on the website for analysis and vectorizing. It will then redirect to another page where you can compare the vectorized and original image. You can even download the file by choosing the format you want. For example, SVG, EPS, and PDF. The link is also shareable if you want someone else to view it.
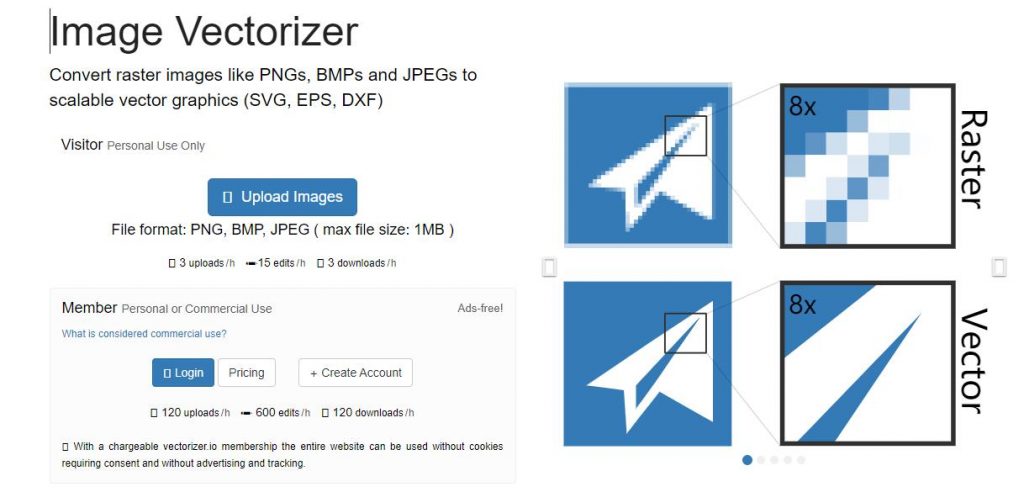
(2) Vectorizer
Paid plan: Free, £4.99 per month This online tool allows you to convert raster images/bitmap images to vector images. For the free version, it only allows three uploads per hour. You should first upload it on the website homepage for it to process. It processes fast and you can compare between the original and new image. The output tends to look clearer than the initial image. It is more elaborative and shows the different distinctions.
Conclusion
It is important to know the different types of bitmap and vector images. If you don’t know how to differentiate you can easily get confused and not know the best software to use or edit with. Also, the online tools are effective if you want to do a quick job. If you are working on many documents, paying for the pro version or license can be most effective.